Managing Actions
All recorded and manually added actions appear in the Action List. From here you can view, edit, reorder, delete, and add actions.
Actions are grouped by page. A new group starts at a recorded navigation step, or when the page the actions run on changes. Each group header shows a Page N badge, the page name, and the page URL underneath. Click a group header to collapse or expand it. Each action item shows the action type, its value or target, and the selector used to find the element.
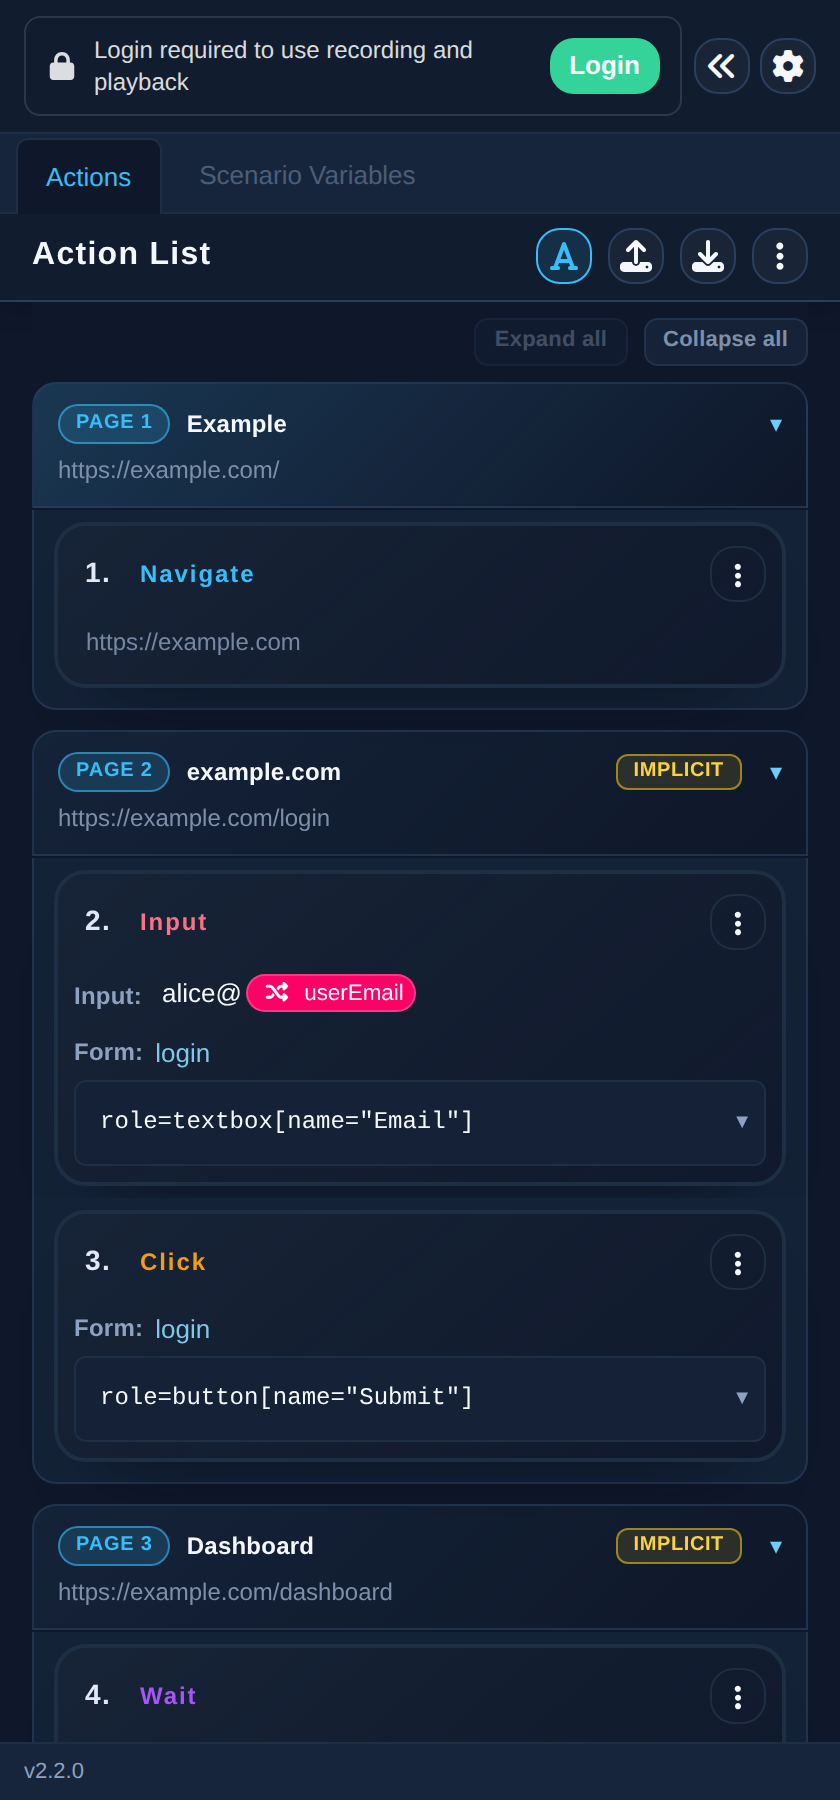
A group header marked Implicit started without a recorded navigation step — the extension detected that the page had changed after a click or input.
Reordering actions
Drag an action item to a new position in the list to reorder it (not available while recording). If moving a step would split up a page's steps in a way that breaks the recorded flow, a warning is shown after the drop.
Working with a single action
Click an action to view its details. Each action item also has its own menu with:
- Edit Action — open the action editor
- Add Action Above / Add Action Below — insert a new action next to this one
- Add Custom Selector — manually add a selector to this action (see Selectors)
- Retake Screenshot — capture a fresh screenshot for the action
- Run to This Step — play the test from the beginning up to this action
- Delete All Failed Selectors — remove selectors that failed during playback
- Delete Action — remove the action from the list
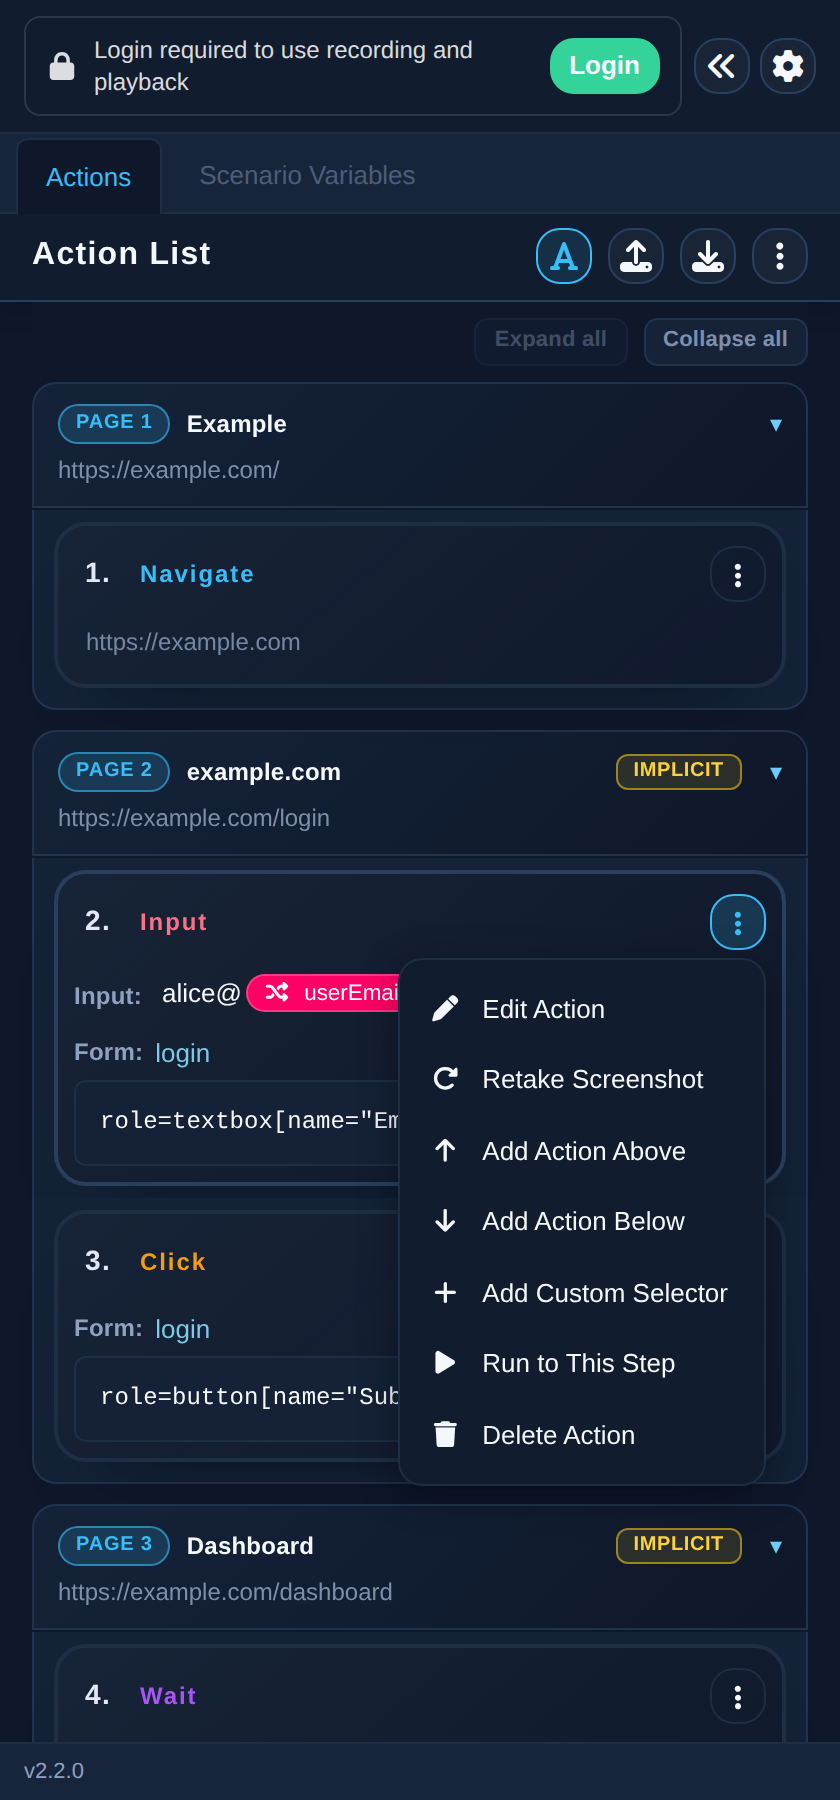
The action list menu
The ⋮ menu in the Action List header offers list-wide operations:
- Add Action — add a new action manually
- Check Page Health — analyze the current page (see Page Health)
- Import Actions / Export Actions — see Import & Export
- Delete All Failed Selectors — clean up failed selectors across all actions
- Delete All Actions — clear the list (you will be asked to confirm)
Adding or editing an action
The Add Action / Edit Action dialog lets you build actions by hand. Choose the Page the action belongs to and the Action type, then fill in the type-specific fields.
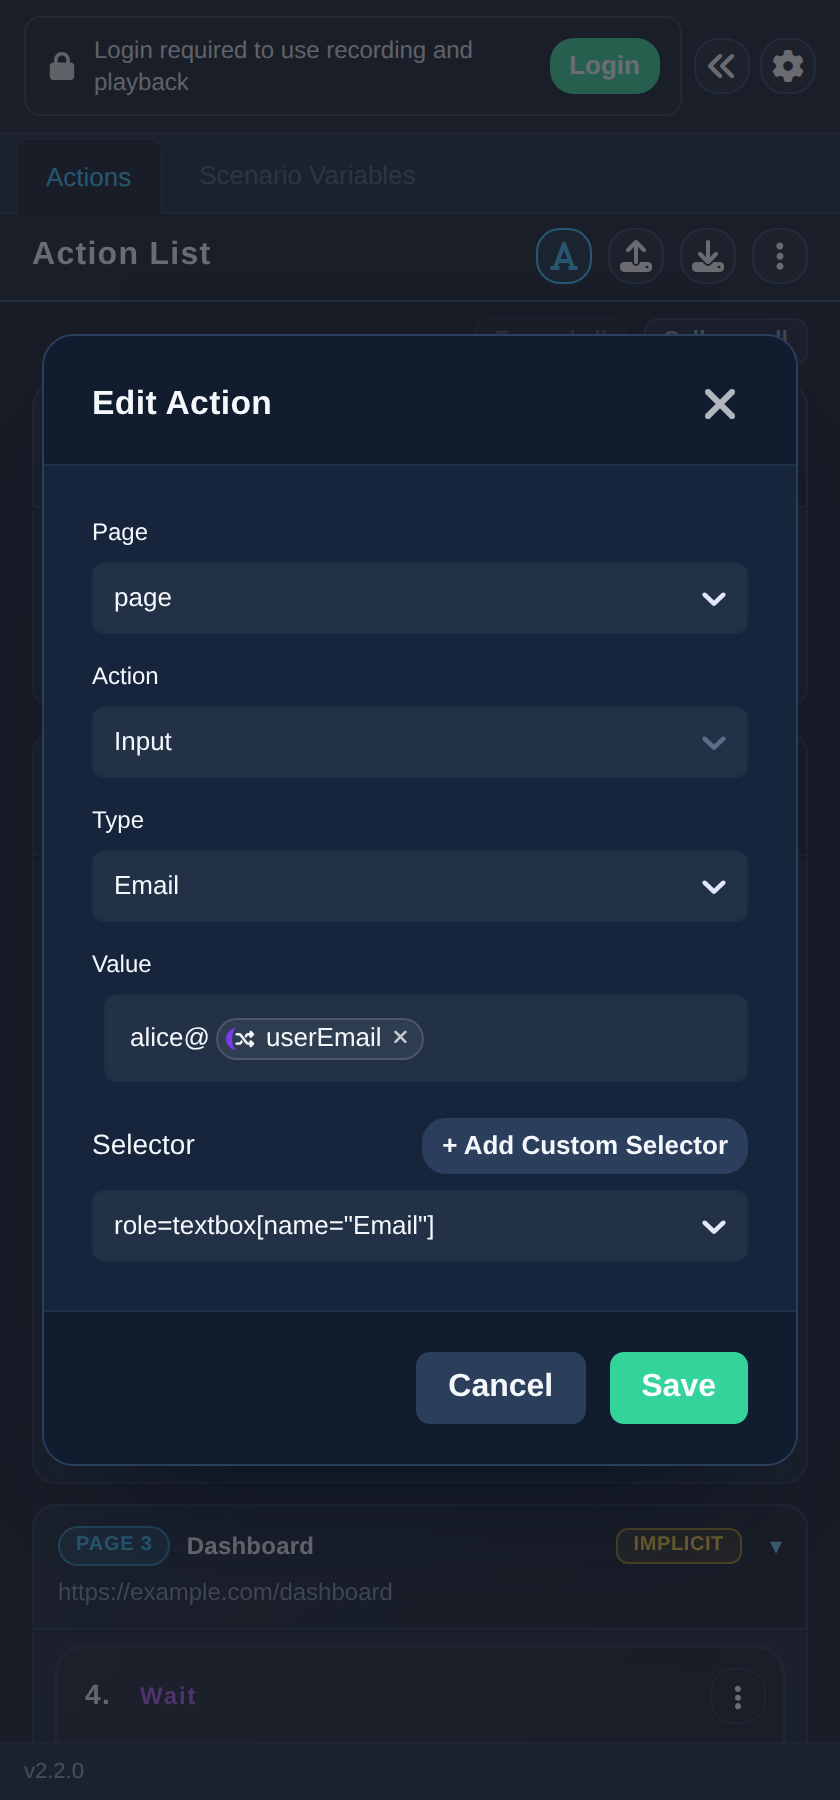
Fields by action type:
- Click / Hover — the target element's Selector
- Input — the input Type (Text, Password, Email, Number, Telephone, URL, Search, date and time pickers, Checkbox, Radio Button, Select, Textarea, and more) and the Value to enter. The value field accepts variables — see Variables
- Assert — an assertion Name, Selector and one or more assertions (see Assertions)
- Navigation — the URL to navigate to
- Press — the Key to press
- Wait — either a Timeout with a duration in milliseconds, or Wait for Event with an event type (Popup, Popup Closed, Download, Request, Response, Console, Dialog, File Chooser, Page Close, Page Crash)
- Wait for element — a Selector and a timeout
- Wait for page load — the page-load state to wait for (full page load, HTML ready, network quiet, navigation start) and a maximum wait time
Click, Input, Assert, Hover, Press, and Navigation actions also have an optional Timeout (ms) field that overrides the global Action Timeout (see Settings) for that one step; leave it blank to use the default.
Click Save to apply your changes.
For actions that target an element, you can use Pick Element in the selector editor to select the element directly on the page instead of typing a selector.